Guide
Run Spcaf In Azure Devops
SharePoint code analysis can also be executed during an Azure DevOps Build. This helps to ensure the correctness of the SharePoint code. All found errors and warnings are listed in the build result during the build. Additionally, the SPCAF reports can be generated and saved to the output directory.
To integrate SPCAF into the build process the following steps need to be performed:
-
Install the SPCAF Build Task. Either by:
Uploading the Build Task
The SPCAF Build Task needs to be uploaded to your Azure DevOps (via HTTP). To simplify this step SPCAF provides a separate application that uploads the build task automatically.
-
Download a preconfigured package of “Integrations for Build and Deployment process” from our Download Page.
-
Extract the Rencore.Code.SPCAF.Build.AzureDevops.zip to a temporary directory, (e.g. c:\temp\SPCAFTemp).
-
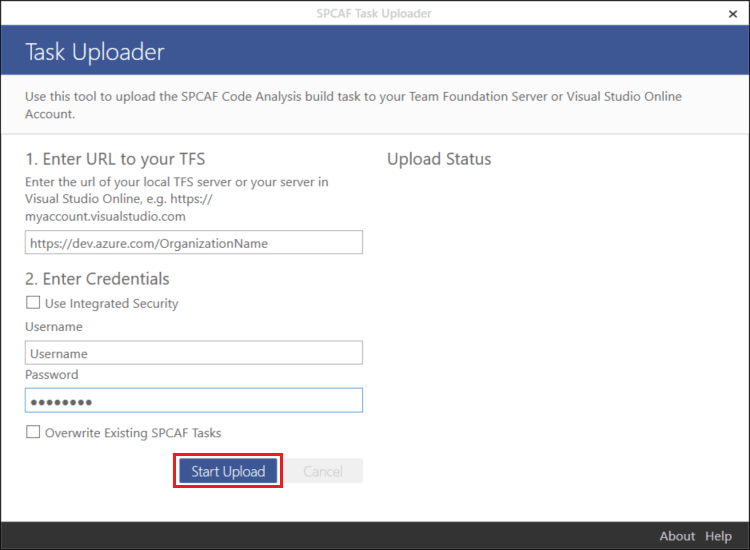
Run the Rencore.SPCAF.TFS2015.TaskUploader.exe application.
-
Enter the URL and the credentials of your Azure DevOps Environment.
-
Click “Start Upload”.
-
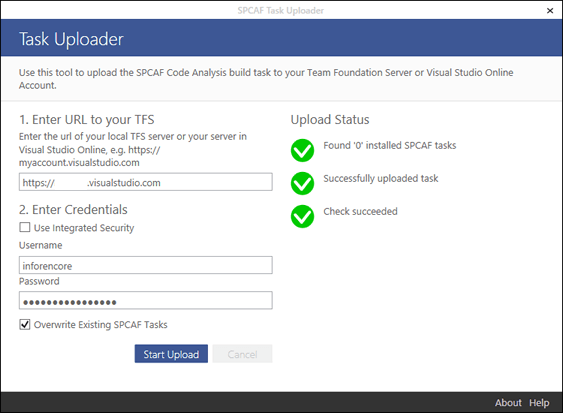
The following screenshots show the result after a successful upload.
-
Install from the Marketplace.
The SPCAF Build Task needs to be installed to your Azure DevOpsOnce from the Marketplace.
- Once logged into your environment click on the Marketplace icon and choose “Browse Marketplace”.
- In the search bar type “SPCAF” and click [Enter].
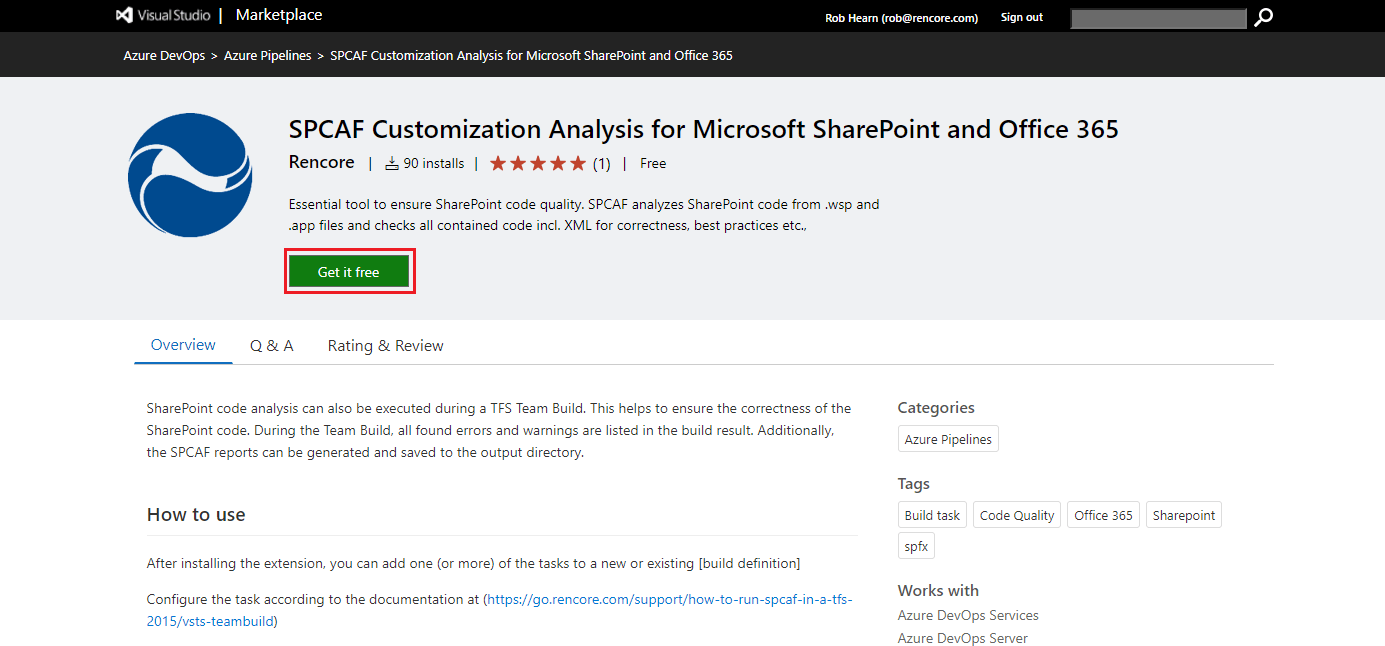
- Click on “SPCAF Customization Analysis for Microsoft SharePoint and Office 365”.
- Click “Get Free” on the new screen that loads up.
- Select the Azure DevOps organization you wish to install SPCAF to and then click “Install”.
- Click “Proceed to Organization”.
Add the SPCAF build step to your build definition
After a successful install, the SPCAF build task is ready to be integrated into a build definition.
- Create a new build definition or open an existing one.
- Edit the Pipeline.
- Click ”+” to add an additional build step to the build definition.
- In the search enter “SPCAF”, select in this category the SPCAF build task, and click “Add”.
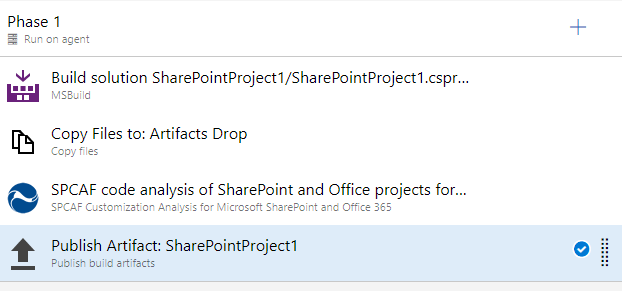
Optional, Now that you have added SPCAF. We advise that you add another task “Copy Files”. Configure this task as follows:
Display name: Copy File to: Artifacts Drop
Source Folder: Set to the Binaries folder from your MSBuild Task (e.g. SharePointProject1\bin\$(buildConfiguration)).
Oufolder: Set this to the Azure DevOps Artifact Staging Directory (i.e. $(build.ArtifactStagingDirectory))
Move this step to be after the MSBuild Task and before the SPCAF Task.
Configure the build step
For SPCAF to analyze the project, you need to configure the task.
-
Select the newly added SPCAF task and configure the build task to your needs.
-
Here you will need to set the following details as a minimum:
Argument
Description
Sample Value
Input directory
Required String. A relative or absolute path to the folder with the analyzable files (e.g. to the drop location).
artifacts\drop\bin
Output directory
Optional String. Relative or absolute path to the folder where the result reports should be written. A relative path is appended to the drop location.
artifacts\drop\SPCAFReports
SPCAF License Key
Optional String. Relative or absolute path to the license key file (.lic). If empty only summary reports are created. A relative path is appended to the sources directory.
\SPCAF\License.lic
SPCAF Settings File
Optional String. Relative or absolute path to the source directory to the settings file. A relative path is appended to the sources directory.
RS02_MinimumRecommended Rules
It is also possible to configure the additional advanced settings for SPCAF.
Reports
Argument
Description
HTML
If checked an HTML report is created as a result of the analysis.
DOCX
If checked an MSWord (.docx) report is created as a result of the analysis.
PDF
If checked an Adobe PDF report is created as a result of the analysis.
CSV
If checked a CSV report is created as a result of the analysis (can be opened in MS Excel).
XML
If checked an XML report is created as a result of the analysis.
Dependency Diagram
If checked a Visual Studio DGML Diagram is created as a result of the analysis.
Advanced Options
Argument
Description
Sample Value
Log File
Relative or absolute path to the source directory to the log file.
//fileshare/spcaf.log
Output filename
Name of the output files. The name is used as a prefix for all generated reports.
spcafresult.html
Verbosity
Level for verbosity to limit the detail level for log messages. Valid values are: quiet|minimal|normal|default
normal
Temp Folder
Relative or absolute path to the source directory to the temp folder.
//fileshare/tmp
Skip Project Creation
If TRUE no project (.spcaf) file is created as an output of the analysis.
Timeout
Optional seconds after the analysis should be canceled automatically.
60000
Filters
An optional list of extensions to filter the input files. e.g. .wsp, .app
*.wsp; *.app; *.dll
Recurse
If TRUE input directory is recursively scanned for analyzable files. If FALSE only the given root will be scanned.
Treat Errors as Warnings
If TRUE identified errors are reported as warnings.
Custom Rules
Optional path to custom SPCAF rule assemblies.
//fileshare/customrules
-
Reorder the Tasks so that you have the “Build Solution” then “Copy Files” then “SPCAF” and finally the “Publishing build artifacts”.
-
Save the build definition.
Run the pipeline.
After a successful configuration, you can run a build and check the correct integration of SPCAF into the build process.
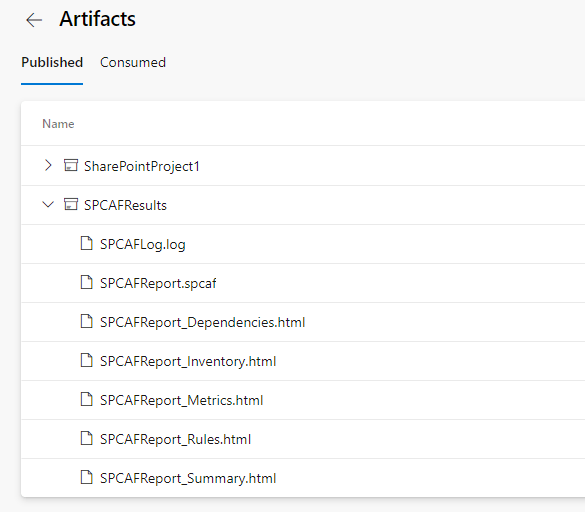
To download the SPCAF analysis result reports go to the section “Artifacts” in the build result. From there you can download a ZIP file that contains the created reports.